 So you’ve decided to give using capos in your class a try….Which ones do you buy? Well here is a classic case of – learn from someone else’s mistakes. I sure made a few on this subject before success.
Here is my evolution through capos in my classroom.
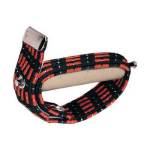
1. The Elastic Capo – This is how I started my capo journey (and could have quickly become the end – but thankfully – no).
What was I thinking when I purchased these. Well, actually I do know what I was thinking….I was making decision with my classroom budget in mind. These guys are CHEAP. If you get them from the right place, we’re talking only a buck or two…. BUT …when these guys came into my classroom….problems abounded. Now, don’t get me wrong, for the right person, this is a perfectly good capo…but not for a classroom and especially not a middle school classroom. Why? Firstly, if you don’t put them on just right, these can have the tendency to buzz pretty bad. Secondly, they come apart. Anytime the two words “come apart” are involved in a classroom setting, BEWARE. The elastic sleeve can be separated by removing the metal bar causing distractions of kids who can’t get them put back together and worse missing pieces. But the worst part…. elastic is fun. Too much fun. Elastic remind students of rubber bands. Rubber bands are fun for shooting. Teacher is not happy. Yeah…get the picture.
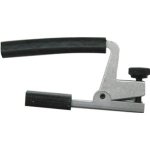
2. The Screw Down Capo – Upgrade! I found a capo that was still very affordable (around $4 a piece).
These are put on the fret and then tightened by hand by tightening the screw on the side. The buzzing was not an issue. They are in one piece. Great! My only complaint with these guys was time. I try and keep my classroom moving! Constantly switching and keeping things exciting. To change frets with these guys means wasting valuable class time. If you are not sure if you’re going to use capos a lot, these could be the answer for you…but for me the loss in time was not worth it.
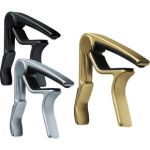
3. The Trigger Capo – Finally, the answer. The drawback on these was and always had been – cost (nearly $20 each).
That kind of money doesn’t sound bad until you multiply it by 27 guitars and now you’re up over $600. That a chunk of change, but for my classroom and my students it’s been worth every penny. These capos are applied by squeezing the trigger. You can change frets in seconds. I went with the Jim Dunlop capos. I think they look great, and plus they were supporters of the Teaching Guitar Workshop Classes (which is where I actually got my Jim Dunlop Capo). The gold standard for capos has always been Kyser (which does make a good capo), but I think the Jim Dunlops are better. I also feel better supporting a manufacture who supports the great work that TGW does as well. Maybe Kyser does now, but that Jim Dunlop that I received at the workshop is my go to capo.
So in conclusion – if I had it to do all over again, I’d start with the trigger capos. As I stated in part 1 of this series…the capo is an invaluable classroom tool, and in this case at least – you get what you pay for.
In the last part of the series on capos, I’ll discuss how to change a song with a difficult chord pattern into one that fits your class by using your new capos.
[social_button button=”facebook” furl=”http://www.facebook.com/pages/Teaching-Guitar-Workshops/98983006090?ref=ts&fref=ts” flayout=”standard ” fwidth=”450″ faction=”like” fcolorsheme=”light”]


